Showing posts with label vegetarian. Show all posts

Sunday, October 10, 2010

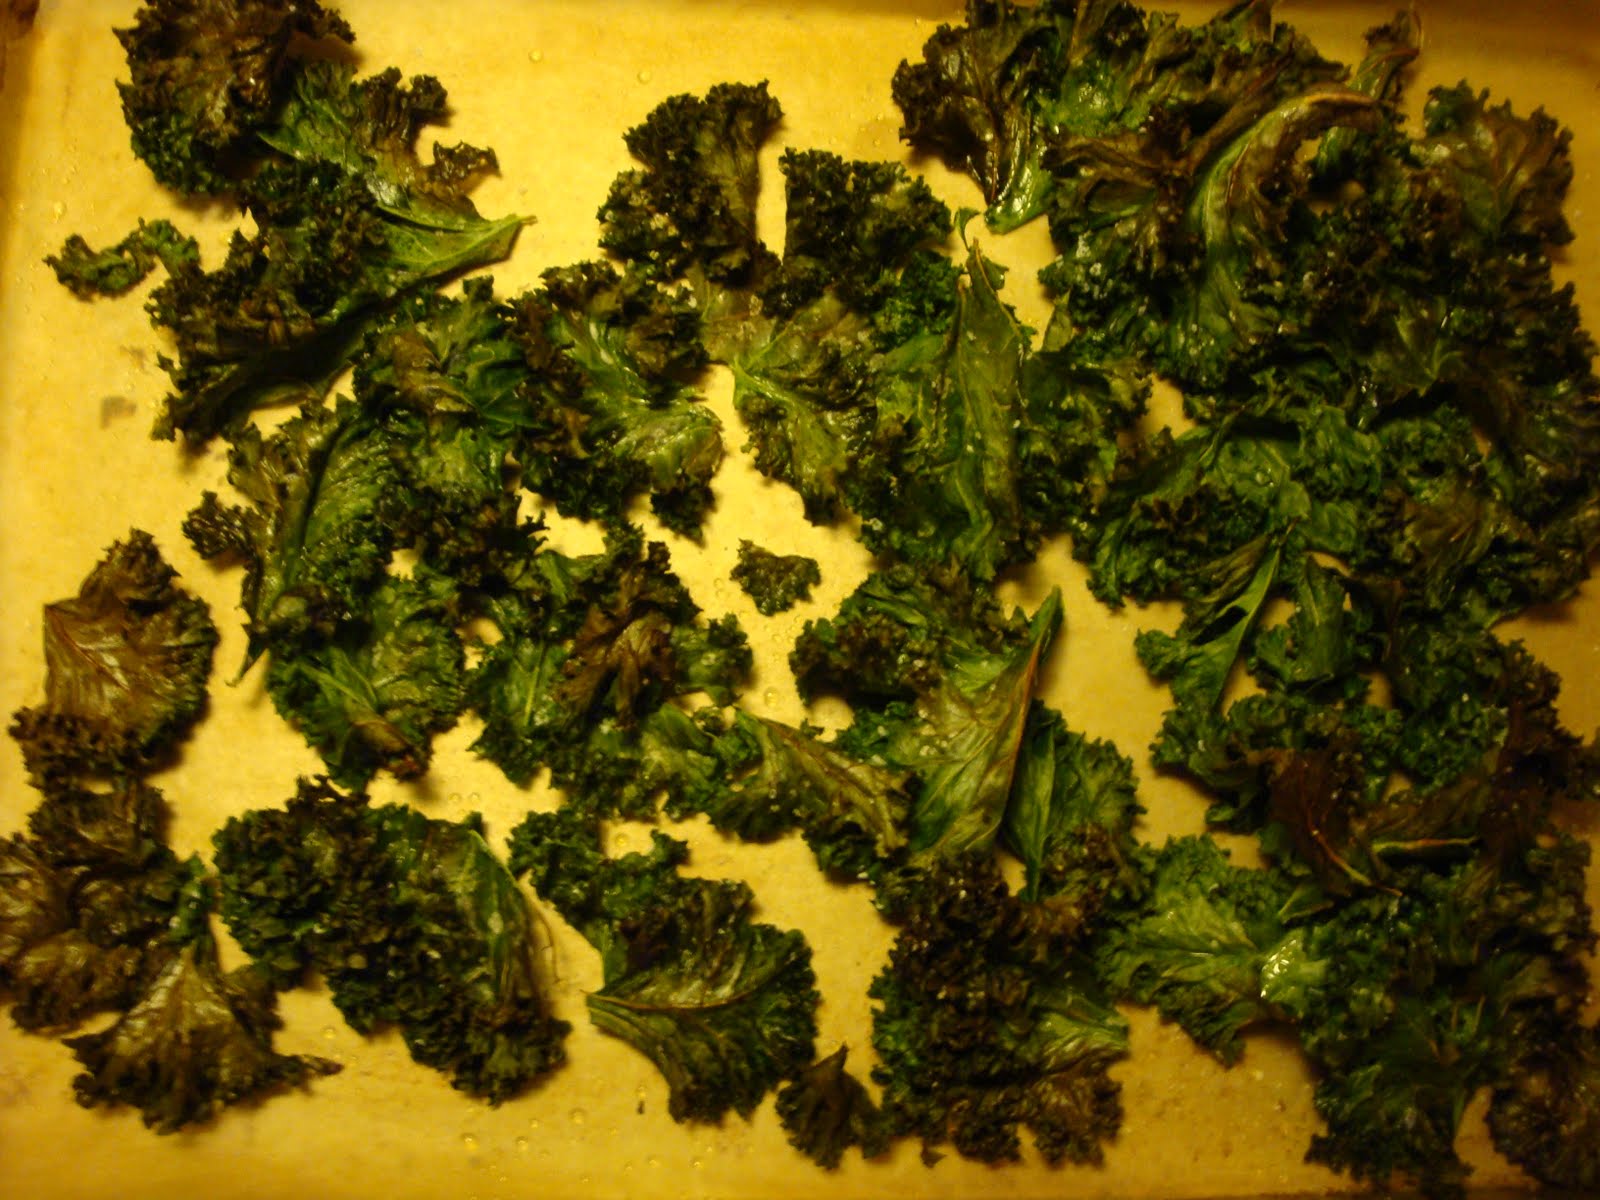
Kale Chips


IE - the only good way to eat kale.

If you're not up on your dark green, leafy vegetables, kale is the one with curly ridges on its leaves. I'm pretty sure I never would have tried kale if CCO hadn't made me. It tastes like you'd expect a dark green, leafy vegetable to taste -- slightly bitter with an aftertaste. I would have happily never eaten it again -- because of the curly leaves, kale can be hard to clean, and it's more bitter than some of it's equally-healthy cousins like chard or collards. But our CSA gives it to us frequently and I always feel guilty letting perfectly good vegetables go to waste, even if I prefer their cousins.

Eat Rating: Good. It really is the best way to eat kale. Crispy, tastes like the outer layer of roasted brussel sprouts.
Difficulty: Easy. Very, very easy.

Recipe courtesy Gregg Keckler

1 bunch kale
Olive oil
sea salt

Preheat the oven to 425 degrees.

Wash the kale and then tear bite-sized pieces of the leaves off the stalk. Set aside and let dry for a few minutes (or if you want to be fancy, use a salad spinner).

Lay the kale pieces out on a cookie sheet and drizzle with olive oil. Sprinkle salt to taste over the chips.

Bake for 15 minutes, then remove and let cool. The chips will be crispy and can be stored in a bag for a day or two at room temperature.

Saturday, April 3, 2010

Leek and Potato Braise


I never ate a leek until I was 25. That's probably a little bit odd. But my mom never cooked with them when I was a kid and then I once read that book, the one about how French women are so much better than everyone else because they understand portion control. One of her techniques was to make yourself an enormous pot of leek soup -- just leeks, water, salt -- and eat that for entire weekends. The idea of eating nothing but a glorified onion and water for 48 hours straight horrified me. Whenever I went to the grocery store, I could never look at leeks without thinking of them as a dieting aid a la Slim Fast.

So I stayed blissfully ignorant of their true potential until CCO bought them one day and added them to something -- fried rice, I think it was. That was when I discovered they weren't half bad. Not like Slim Fast at all.

A couple months back, one of the bloggers I follow decided she would try a bunch of recipes with leeks. I was intrigued. Perhaps leeks could be not just "not bad" but actually good. So I made this Leek and Potato Braise for one Meatless Monday and I am now a leek convert. This recipe cooks the leeks and the potatoes slowly for nearly 2 hours. At the end you have a creamy deliciousness, with just hints of spiciness for the leeks. I think I've made this about four times in the past three months. The only downside is it takes a while to cook and if you're very hungry, it tempts you horribly by filling up your entire house with a delicious smell of leeks cooking. We've eaten this several times as a main dish. It's also great as a side.

From All About Braising by Molly Stevens Via The Arugula Files

Eat Rating: Awesome.
Difficulty: Easy. It just takes awhile. You'll need some kind of casserole dish with a tight-fitting lid.

3 large leeks, washed and trimmed
2 1/2 pounds yukon gold potatoes (that's about 5 medium sized ones)
1 1/2 tsp fresh thyme, chopped (LN: or sub in 1/2 tsp dried)
1 1/4 cup stock, chicken or veggie
1/4 cup cream

Preheat oven to 325 degrees.

Cut the leeks in half lengthwise almost all the way through, then chop into half inch pieces. Set aside.

Peel the potatoes, then chop into 1/2 inch pieces. Add to the leeks and place in the bottom of your casserole dish. Add the thyme and salt and pepper if desired and toss to cover.

Place the stock in a saucepan and heat just until boiling. Pour over the potatoes and leeks. Cover the dish with the lid and place in the oven. Cook for 45 minutes, then remove lid and stir. Replace lid and cook for another 25 minutes.

Increase temperature to 425 degrees, then add the 1/4 cup of cream and give it a good stir. Cook another 30 minutes until the liquid is absorbed and the tops have begun to brown. Remove from oven and serve immediately.

Sunday, February 28, 2010

Vegetarian Squash Casserole


In anticipation of our honeymoon extravaganza to the Big Easy, CCO and I decided to go vegetarian for a month. Although we've been eating vegetarian once a week for Meatless Monday, doing it all day everyday was a challenge at first. (There are only so many days in a row you can eat eggs before it gets boring...)

So CCO suggested we pick up a copy of The Moosewood Cookbook. When he had been a vegetarian during his college days at Harvard, it was his stand-by. Once I finally found a copy, I could see why. There are tons of suggestions for how to move to vegetarian without eating a salad every night (though there is a great chapter on salad). One section that caught my eye was the one on baked dishes, in particular this squash casserole. It's super easy and most things you'd probably have in your house anyway.

If you want to make this, I'd suggest it as a side dish along with something else. If you want it to be the main feature, serve it with crusty bread or pita, something else that has some texture and substance. My one criticism was that everything was so smooth, it was a little like eating baby food (very delicious baby food, but baby food nonetheless).

Eat Rating: Delicious. The squash complements nicely with the tanginess of the yogurt and feta.
Difficulty: Easy.

Adapted from The New Moosewood Cookbook by Molly Katzen

4 cups cooked squash or pumpkin, mashed or pureed (LN: I used acorn. You could also do this with butternut)
1 tbsp olive oil
1 onion, chopped
2 small bell peppers, any kind, chopped
4 cloves of garlic, minced
1/2 cup yogurt (LN: She recommends using firm Greek yogurt. It worked find with plain Yoplait)
1 cup crumbled feta cheese
1/2 cup walnuts, chopped (optional)

Preheat the oven to 375 degrees.

Heat the olive oil in skillet and saute onions and bell peppers until vegetables begin to soften. Add garlic and cook until vegetables completely softened.

Place the mashed squash in a large bowl. Add the onions and peppers, yogurt and feta and mix until well-combined. Spread the casserole into a 9-inch square baking dish (or comparable) and sprinkle the walnuts over the top.

Bake for 25 to 30 minutes or until the casserole is thoroughly heated and bubbling. Serve immediately with some crusty bread or warmed pita.

Sunday, November 29, 2009

Pasta with Butternut Squash Sauce


Don't leave out the lemon juice. It adds a nice acidity to the otherwise very heavy cream sauce. (I followed the recipe exactly, so click the link to get it)

Adapted from Simply Recipes

Eat Rating: Delicious. Very heavy though, so prepare to be filled.
Difficulty: Easy to Medium.

Tuesday, November 24, 2009

Chard Sweet Potato Gratin


I like to pretend that root vegetables are just as healthy for me even when I slather them in cheese.

The only major change we made was the cheese. Deb calls for using gruyere cheese. I forgot to pick it up at the store, so we were stuck with what was in the fridge. Those choices were parmesan or smoked cheddar that I had picked up from our CSA. We went with the cheddar and it was a brilliant choice. The smokiness added a nice subtlety to the sweetness of the vegetables. We also cut this recipe in half since it feeds 12 and even if we included the dog and his massive appetite separately, we'd still only have four. CCO and I thought this would be lovely as a side at Thanksgiving dinner.


Eat Rating: This is what heaven tastes like.
Difficulty: Medium. It helps if you have a mandoline for slicing the sweet potatoes. Also a whisk for making the bechamel sauce.

Adapted from Smitten Kitchen

3 1/2 tbsp butter
1/2 small onion, finely chopped
1 large bunch of swiss chard, leaves cut off the stalks and roughly chopped
1 1/2 cups milk
1 1/2 tbsp flour
1 clove of garlic, minced
2 large sweet potatoes, peeled
1/2 tsp dried thyme
3/4 cup smoked cheddar, grated

Fill a medium-sized pot with water and add the sweet potatoes. Bring the water to a boil, reduce heat to a simmer and cook for 10 minutes. You just want the potatoes parboiled a little.

After ten minutes, drain the potatoes and allow to cool until you can easily handle them. Using a mandoline, slice thinly, about 1/8 inch (Note: you can do this with a knife if you don't have a mandoline. Try to get the slices as thin as possible). Set aside.

In a medium saute pan, melt 1 tbsp of butter. Add the onions and saute until translucent. Add the chard and cook until the greens have reduced by half. Remove from heat and set aside.

In a small saucepan, heat the remaining butter (1 1/2 tbsp). Add the garlic and sautee about 1 minute until browned. Using a whisk, add in the flour, constantly stirring until you have a light brown paste. Gradually add the milk to the flour/butter paste about a 1/4 cup at a time, stirring constantly between additions. You want a thick, gravy-like sauce to develop. Once it's sufficiently thick, remove from heat.

Preheat the oven to 400 degrees.

Butter or grease a 8 x 8 square glass dish. Layer some 1/3 of your sweet potatoes on the bottom, then 1/2 of the chard on top. Spoon a few tablespoons of the bechamel sauce on top and sprinkle cheese. Repeat once more, topping with the last 1/3 of sweet potatoes. Top with any remaining bechamel sauce and cheese.

Bake for 1 hour until the cheese on top has browned and the liquid is bubbly. Remove from the oven, allow to cool slightly and serve immediately with crusty bread for soaking up the leftover sauce.

Friday, November 20, 2009

Pumpkin Whoopie Pies

Picture courtesy Bon Appetit

We started a baking club at my office. Every month or so, we have a theme and people bring in a dish along that theme. For our inaugural event, the theme was pumpkin.

Now everyone in the office knows I bake a lot, so I really had to bring it. Something delicious but not too fancy. Something sweet and fall but not too predictable. Something like a Pumpkin Whoopie Pie with Maple Cream Filling.

You can feel free to admit that you now wish you worked in my office.

Eat Rating: Most responses went something along these lines: "This is so wrong. But so good."
Difficulty: Medium

Adapted from Bon Appetit, October 2009

Filling:
1 cup of powdered sugar
1 cup (2 sticks) butter, softened to room temperature
7 oz. marshmallow fluff (about 2 cups)
3 tbsp maple syrup

Cake:
3 cups flour
2 tsp cinnamon
1 1/2 tsp baking powder
1 1/2 tsp baking soda
3/4 tsp salt
3/4 tsp ground nutmeg
3/4 tsp ground cloves
6 tbsp (3/4 stick) butter, softened to room temperature
3/4 cup brown sugar
3/4 cup granulated sugar
1/2 cup vegetable oil
3 large eggs
1 15 oz. can pumpkin puree
1/2 cup milk

Combine and sift all the dry ingredients (flour through nutmeg). In a bowl or Kitchenaid, beat the butter with the brown and granulated sugars. Add in the oil, then the eggs one at a time, beating between each. Add in the pumpkin puree, then 1/2 of the dry ingredients, the milk and then the remaining dry ingredients. You should have a thick, cake batter.

Preheat the oven to 350 degrees. Line two cookie sheets with parchment paper. Spoon 2-3 tbsp of batter onto the parchment paper, fitting 12 cakes per sheet. Bake 20 minutes, or until tester inserted comes out clean. Remove cakes from cookie sheet and allow to cool on a wire rack. Repeat until you run out of cake batter. You should get about 46 to 48 small cakes.

Once the cakes are cool, make the filling. Add the sugar and butter to a bowl or Kitchenaid and beat until fluffy, about 2 to 3 minutes. Add in the marshmallow fluff and maple syrup and then beat until well combined. Spoon 1 to 2 tbsp of filling onto a cake, then top with another cake. (Note: Don't try to put more than 2 tbsp of filling between the cakes. It will just ooze out and make a mess. You will probably have some leftover filling. Don't sweat it)

Serve to your friends and become instantly popular.

Monday, November 9, 2009

Butternut Squash Gnocchi

Nothing says comfort like an enormous bowl of squash, butter and cheese.

Eat Rating: Delicious.
Difficulty: Medium. Be careful not to add too much flour or overknead. You want it to be light and airy, not thick and chewy.

Adapted from Apples and Butter

1 butternut squash, about 2 lbs
1 tbsp olive oil
1/2 tsp nutmeg
2 - 3 cups of flour
3 tbsp butter
2 tbsp parmesan cheese

Preheat the oven to 400 degrees. Peel the butternut squash, cut in half and scoop out the seeds and membrane. Cut into 1 inch chunks, toss in olive oil and then place on a baking tray. Bake the squash for about 30 minutes, turning the pieces or tossing after about 15 minutes, or until the squash is easily pierced with a fork.

Remove from the oven and allow to cool. (This step can be done a day or several hours ahead of time)

Place the cooked butternut squash in a bowl and mash until you have a thick puree. Add in the nutmeg and stir until thoroughly mixed in. Gradually add in the flour, 1/2 cup at a time, until the squash forms into a thick dough.

Flour a cutting board or the countertop and turn your dough out onto it. Divide into four pieces, then roll each piece into a long, thin cylinder. Use a knife to cut the strand into 1 inch pieces.

Bring a large pot of water to boil. Drop the gnocchi into the pot of water. The gnocchi should drop to the bottom. When they are finished, they will float to the top.

While the gnocchi is cooking, melt the butter in another small saucepan. Once it's melted, remove from heat.

After gnocchi floats, remove from the water using a slotted spoon. Toss with butter and parmesan cheese. Serve immediately.

Any uncooked gnocchi can be frozen for up to a month.

Tuesday, September 22, 2009

Peach and Tomato Bread Salad

Peaches and tomatoes: a perfect summer combination.

My co-worker Kathy suggested this recipe -- a salad of fresh peaches and tomato. At first I found this idea weird. But after I thought about it, I decided to give it a try. I modelled it after the Cherry Bread Salad. So if you particularly like a certain ingredient you can add more or omit if you don't like it.

We skinned both the tomato and the peach. To do that, bring a small pot of water to boil. Once it's boiling, drop the peach or tomato in the hot water for about 30 seconds, then place in a bowl of cold water. The skin should slide right off.

Inspired by Kathy W.

Eat Rating: Delicious. Make sure the peach is very ripe for best results.
Difficulty: Easy.

1 peach, skinned and cut into slices
1 yellow tomato, skinned, seeded and cut into slices
1/2 loaf of day-old crusty French bread, cut into cubes
1 lemon
2 tbsp olive oil
1-2 tbsp balsamic vinegar
Mozzarella cheese, if desired


Place the tomato and peach slices in a large bowl and squeeze lemon over, tossing until coated.

Heat a skillet on the stove, then doss in the cubes of bread, coating lightly with olive oil. Continue cooking on the stovetop until bread has begun to brown. Once browned, remove croutons from pan, cook slightly and then add to the tomato and peach slices.

(If using cheese, add it now)

Drizzle olive oil and balsamic vinegar over the croutons and fruit, tossing until well-coated. Serve immediately.

Tuesday, September 15, 2009

Melon Lime Popsicles

Super easy summer treat.

Sorry for the long hiatus. I have a good reason.

Well, it's not exactly good, but I do have a reason. You see I bought this melon at the farmer's market for a dinner party two weeks ago.

Melon with limes.

And I had no idea what kind of melon it is. But I felt duty-bound to figure out what kind it was before blogging.

I had gone to the market two weeks ago in search of a honeydew. CCO and I were hosting dinner club and it was horribly hot outside, so I had decided on popsicles for dessert. I found this recipe from the July 2004 Gourmet, which was very simple and easy. But at the market, there were no honeydews. Plenty of watermelons, tons of cantelope, but no honeydews. One of the farmer's told me this melon would work well as a substitute, so I bought two for popsicles but forgot to ask its name.

Well, I am happy to report back that it is, in fact, a canary melon. Don't be confused by the green streaks. It's not a christmas or a crenshaw. If you can't find a canary, you can sub a honeydew, since that was the original recipe anyway. The original recipe also calls for you to make a simple syrup to add to the melon/lime. But mine was sweet enough without it, so I stuck with straight fruit.


Eat Rating: Awesome
Difficulty: Very easy. Requires popsicle or lollipop sticks, popsicle molds or ice cube tray and food processor.

Adapted from Gourmet Magazine, July 2004

1 medium-sized canary melon (or honeydew melon)
2/3 cup of freshly squeezed lime juice (about 4 limes worth)

Cut the melon in half and remove seeds. Cut off the rind and chop into chunks.

Place chunks in the food processor and pulse until the melon has liquified. Stir in lime juice. Pour mixture into popsicle mold or ice tray. If using ice trays, place immediately in freezer for about 1 hour. Remove from freezer and place sticks into each cube. Return to freezer and freeze for at least another 3 hours.

Serve within two days.

Monday, August 24, 2009

Vegan Maple Banana Ice Cream

Easiest ice cream ever.

I found this on Apartment Therapy The Kitchn and frankly its pretty damn genius. As I mentioned before, I always get sad when I come across ice cream recipes that require an ice cream maker because I don't have one. But this recipe for banana ice cream doesn't require an ice cream maker or even dairy products. Just frozen bananas and any extra flavorings you might want. I added some maple syrup but CCO's brother suggested it might also be good with a little bit of bourbon.

Eat Rating: Awesome. Deliciously smooth with a very real banana flavor.
Difficulty: Easy. Requires a food processor or blender.

Makes about 1 1/2 cups.

Adapted from The Kitchn

5 medium-sized bananas, frozen
2 tbsp maple syrup

Peel the bananas and place in a food processor. Pulse several times to break up. Through the feed tube, add the maple syrup. Pulse again until smooth. Place the banana mixture into a plastic container and freeze at least 1 hour before serving.

Monday, August 17, 2009

Couscous and Feta Stuffed Peppers

The reason I didn't have enough peppers to pickle.

I liked this recipe but I shall share a secret: I don't actually like stuffed peppers. The fillings are definitely good. I always feel like the peppers get dried out, though, and taste somewhat leathery. Half the time I just end up eating all the filling out. But this filling was so delicious, I've made just the filling another half dozen times and eaten it all by itself. If you want to do that, just skip the part about baking the pepper shells and chop one to add to the onion/zucchini mixture.

Eat Rating: Delicious, though better without the outer-pepper shell.
Difficulty: Easy.

Adapted from Smitten Kitchen

1 1/4 cups of chicken or vegetable broth
1 cup of dry couscous
5 bell peppers
1 tbsp olive oil
1 zucchini, chopped
1/2 onion, chopped
1/2 cup crumbled feta cheese
1/2 cup chickpeas, either canned or soaked overnight then cooked (LN: CCO liked them, but I've omitted them subsequent times)
3 tbsp tomato paste
1 tsp fennel seeds (can omit if you don't like the taste of fennel)

Preheat oven to 350 degrees. Cut the tops off the bell peppers and pull out the seeds and membrane. Place the peppers cut side up on a baking sheet and cook for 10 minutes until softened. Remove from oven and set aside.

While the peppers are baking, in a small saucepan, bring the broth to a boil. Remove from heat, add the couscous and stir just until combined. Cover and let sit for 10-15 minutes.

If desired, cut the stem out of the middle of the pepper tops and chop the leftover peppers.

In a large saute pan, heat oil then add the onions, zucchini and pepper if using. Saute for about 5-7 minutes until softened. Add the chickpeas, fennel seed and tomato paste. Cook another minute. Remove from heat.

With a fork, fluff the couscous, then add to the vegetable mixture. Stir well, then add the feta cheese and mix until well combined.

Fill the pre-baked peppers with the couscous mixture. Return the peppers to the oven for 5 minutes until cheese has softened. Serve immediately.

Wednesday, August 12, 2009

Roasted Red Pepper Sauce with Pasta and Mozzarella

Better than tomatoes.

In a fit of inspiration (insanity?), I bought five pounds of peppers at Eastern Market the other day. The intention was to pickle them, but then a recipe for stuffed peppers struck my fancy. After I made those, I was one pepper short of the pickled peppers recipe. Instead I roasted them and left them in a jar of olive oil in my fridge for a few days. I thought I might try making a red pepper pesto to use up the leftover pine nuts, but then I found this recipe, which seemed perfect. Pine nuts and red pepper might be weird anyway.

The recipe calls for you to use store bought roasted red peppers. You can obviously do that, but to roast your own, heat the oven to 450 degrees and place two red peppers on a baking sheet. Cook 10 minutes, flip over and cook 10 more on the other side. You want the skins to be blackened and shrivelling. Remove from the oven and use tongs to place in a bowl. Cover the top of the bowl with plastic wrap and let sit for about 15-20 minutes. Remove the plastic wrap. The skins should slide off easily. Tug the stem and the top and seeds should also remove easily. Use immediately or pack in oil in a jar and refrigerate.

Eat Rating: Awesome.
Difficulty: Easy. Requires food processor or blender.

Adapted from Food and Wine February 2008, via Kate in the Kitchen

1 lb dried gemelli (LN: I'm not even sure which one that is. I used penne)
2 roasted red peppers
1/4 cup olive oil
1 tbsp tomato paste
2 cloves of garlic
2 sun-dried tomatoes, packed in oil (LN: Omitted. I was out.)
9 fresh basil leaves, divided
6 oz. fresh mozzarella, cut into 1-inch cubes
Salt and pepper to taste

Heat a large pot of water to boil and cook the pasta according to the package instructions.

While pasta is cooking, place the peppers, olive oil, tomato paste, garlic, tomatoes and 3 basil leaves in a food processor. Pulse to combine.

Once pasta is cooked, drain and toss with the sauce and mozzarella. Tear up the rest of the basil and add to the pasta. Serve topped with parmesan cheese.

Friday, August 7, 2009

Bread and Butter Pickles


Bread and butter pickles have always been my grandma's favorite. Unlike tart dill pickles, these are sweeter, probably from the 2 cups of sugar added to the vinegar during cooking, and a little spicier than your regular pickle. They get their signature yellow-green color from tumeric added to the vinegar during cooking. Bread and butter pickles supposedly got their name during the Great Depression when people would eat them on sandwiches in the place of meat between two pieces of buttered bread. That sounds somewhat gross, but I wouldn't be surprised if my Gram ate them that way. She has, after all, been known to drink pickle juice on occasion.

B&B's are best served as a side dish or a condiment to hamburgers.

This recipe makes 1 quart.

Eat Rating: Awesome. I am more partial to these than straight dill.
Difficulty: Easy to Medium.

Adapted from Brock Kuhlman, Hill's Kitchen

3 pickling cucumbers, cut into 1/4-1/2 inch slices
1 white onion, cut into 1/4-inch slices
1/2 cup pickling salt
1 1/4 cup white vinegar
1 cup apple cider vinegar
2 1/4 cup sugar
1 tbsp mustard seeds
1 tsp crushed red pepper
3/4 tsp celery seeds (LN: Omitted. Didn't have any.)
1 inch cinnamon stick, broken into pieces
6 whole all spice
6 whole cloves
1/2 tsp ground tumeric
1 tsp alum (LN: Omitted)

Place the cucumbers and onions in a colander sitting over a bowl and sprinkle vegetables with the salt. Let sit in the fridge overnight.

Place the jar(s) on a cookie sheet and place in the cold oven. Heat to 250 degrees. Once the oven reaches temperature, turn off the heat and leave the jars sitting in the oven.

Wash the cucumbers and onions to remove residual salt. Set aside.

Fill a small pot with water, bring to a boil then toss in the jar lids and rings to sterilize.

In a medium-sized pot, combine the vinegar, sugar and spices. Bring to a boil, then reduce heat and simmer 10 minutes. Add the cucumbers and onions to the vinegar, then boil an additional 30 seconds.

Remove a jar from the oven with a clean kitchen towel. Using a slotted spoon, fill the jar with cucumbers and onions, leaving at least 1/4 inch of space from the top of jar. Once filled with cucumbers, pour vinegar into the jar, making sure the cucumbers are completely submerged and there is at least 1/8 inch between the top of the jar and the vinegar.

Remove lid and ring from water. Wipe the lip of the jar to make sure it is clean and nothing will mess up your seal. Place ring on lip of jar, then tighten the ring until it is finger tight.

Let the capped jar sit upright for two minutes, then flip over so the jar is sitting on its top and leave upside down for 10 minutes. Flip back over and let come to room temperature. The lid should form an airtight seal. You will know if when you push down on the lid it does not give.

Pickles are best if steeped 4 weeks but can be eaten after 10 days. Once the jar has been opened, eat within a few weeks.

Wednesday, August 5, 2009

Pickled Carrots

I'm not an enormous carrot fan. Probably because, like celery, I associate carrots with dieting. But when I saw all the spring carrots at the farmer's market, I felt the need to buy them.

Peel the carrots. You can either cut them into uniform sticks like David Leibovitz did or just cut off the ends and leave them in the vague carrot shape like I did.

I did diverge from him in one respect: he suggests cold packing, ie allowing the pickling liquid and carrots to come to room temperature and then packing the jars. Since I'm somewhat paranoid about contamination, I just hot-packed mine. If you want to cold pack, follow his directions.

Makes 1 quart.

Eat Rating: Good. For carrots.
Difficulty: Easy to Medium.

From David Leibovitz

1 lb carrots, peeled
1 1/4 cups water
1 cup apple cider vinegar
1/4 cup sugar
2 garlic cloves, crushed
1 1/2 tsp fennel seeds (LN: He says you can also use dill or anise seeds)
1 1/2 tbsp salt
2 bay leaves

Place the jar in the cold oven on a cookie sheet, then turn up the heat to 250 degrees. Once the oven reaches temperature turn it off.

Bring a medium-sized pot of water to boil, then drop in the carrots for 2 minutes. Drain carrots and douse in cold water to stop the cooking.

Fill a small saucepan with water and bring to a boil. Drop in the lid and ring for the jar.

In the same medium-sized pot, add the water, vinegar, sugar and spices. Bring to a boil, then reduce heat and simmer two minutes. Add the carrots. Cook one minute more.

Remove the jar from the oven using a clean kitchen towel. Using tongs, place the carrots in the jar. Then pour the pickling liquid over the carrots, making sure the carrots are completely submerged liquid reaches at least 1/4 inch below the top of the jar. Remove the lid and ring from the hot water and place on top of jar. Screw the ring on finger tight. Let the jar sit upright for two minutes, then flip over so it is resting on the lid. Leave upside down for 10 minutes, then flip over.

As the jar comes to room temperature, it should pressurize and seal.

The pickled carrots will keep for up to a year. Once the jar is opened, eat within 4 weeks.

Monday, August 3, 2009

It's a Recession!: Homemade Dill Pickles


"Canning is the new knitting," according Brock Kuhlman, the chef instructor at Hill's Kitchen in Eastern Market.

A few weeks ago, I took his class on pickling. It was sort of a strange class choice. For one thing, I don't love pickles. I mean I like some pickles, relish in particular. But when they ask me at the deli whether I need a dilled spear with my sandwich, I usually say no. However, I thought it would be cool and I didn't already know how to do it. In the past, I've found a lot of cooking classes to be very elementary (this one CCO and I took in the winter, the instructor spent about five minutes talking about the difference between an onion and a shallot.) This one, though, was pretty cool. He covered the science behind pickling, several different methods and about four recipes. At one point, I even got to be his Vanna White-like assistant to help with the Chow Chow.

Canning is not as hard as you think. I've done it for years with jam, but he still showed me a couple new tricks. Most important rule: when cutting the cucumbers, make sure the spears will fit in the jar. You're pretty much screwed if you're filling jars and then realize the spears are too long. I've also started always using his oven-sterilization method. So much easier than boiling the jars.

Buy very firm cucumbers.

Pickling salt is plain salt without the extra compounds they add in to prevent clumping. If you can't find pickling salt at the store, look for sea salt.

This recipe made me about 4 quarts (actually 3 1/2, but it could have been four). If you want fewer, you can cut the recipe in half, but it's very important you not change the ratio of water to vinegar. Otherwise you might mess up the chemical balance.

Eat Rating: These are pretty sour and very dill-y.
Difficulty: Medium. You need two pots. It's a good idea to have a funnel and a jar lifter on hand.

Adapted from Brock Kuhlman

4 pickling cucumbers
1 cup white vinegar
1 cup cider vinegar
4 cups water
2/3 cup pickling salt
16 cloves of garlic, peeled and crushed
1/2 of a bunch of fresh dill, washed thoroughly
2 tbsp red pepper flakes
2 tbsp coriander seeds
1 tsp ground cumin
2 tbsp yellow mustard seeds
4 bay leaves, crumbled or torn into smaller pieces
2 tsp alum* (LN: Omitted)

Prepare the cucumbers. Wash them to remove any dirt, then cut off the ends. Cut into quarters, lengthwise to make spears. Place the spears in a bowl of ice water and soak for two hours.

About half an hour before your cucumbers will be ready, place 4 clean, quart-sized jars on a cookie sheet and set in the cold oven. Turn the temperature up to 250 degrees. When the oven reaches 250 degrees, turn it off and leave the jars inside.

Heat a small pot of water to boil, then reduce heat. Drop the rings and tops in. You will need these later.

In a medium-sized saucepan, heat the water, vinegar and spices to a boil. Drain the cucumbers and add to the vinegar mixture. Return to a boil and cook for about 1 minute.

With a clean kitchen towel, remove the jars from the oven. Using tongs, place several cucumber spears in the jar, along with a few garlic cloves and some dill, if possible. Once the jars are packed with cucumbers, set the funnel on top of a jar and fill with vinegar mixture, making sure that the cucumbers are completely covered by the liquid.

Remove a lid from the hot water and place on top of the jar. Take a ring and twist it onto the jar finger tight. Do this for all the jars, then let them sit for two minutes. Flip the jar over so they are standing on the lid. Let sit upside down for 10 minutes, then flip right-side up. This will pressurize the jar, creating an airtight seal with the lid. You can tell if it has sealed correctly because you won't be able to push down on the lid.

Allow the pickles to sit in a cool place for six to eight weeks before opening. Once opened, enjoy the pickles within a few weeks.

* Alum is a chemical used in canning to help maintain the crispness of the produce. If you buy firm produce and use the plumping method outlined at the beginning of the recipe, you don't really need alum.
Saturday, August 1, 2009

Tomato Bread Soup

Crunchy and soft, all in one.

I have been sick with a cold for several days now, drinking pitcher upon pitcher of water and pots of tea. A couple days ago I picked up a few heirloom tomatoes at the farmer's market, intending to make caprese salad this weekend. Instead, I opted for Tomato Basil soup. But since I can never do anything without a little bit of flair, I opted for this tomato bread soup I had seen on Mark Bitman's blog awhile back. It's similar to French onion soup, with chunks of bread incorporated into the soup to give it some bulk. I did make one change: I held back a couple chunks of the bread and used them to top the soup like croutons, so there were several textures from the sogginess of the bread that sits for 10 minutes plus some crunch from the crouton tops.

To peel the tomatoes easily, heat a pot of water to boiling, then drop each tomato in the water for about 10 seconds. The skins should easily peel off.

Eat Rating: Awesome. I'm sensing a new staple.
Difficulty: Very easy. One pot even.

Adapted from Tomato Soup With Bread (Pappa al Pomodoro), Bitten Blog, NYT

1/4 cup olive oil
1 small onion, chopped
2 cloves of garlic, minced
3 cups of tomato, peeled, cored, seeded and chopped (LN: This was about 3 large-ish heirlooms)
2 cups of broth, water or tomato juice
1/2 loaf of crusty bread, preferably day-old, cut or torn into bite-size chunks (LN: I used a baguette bought that morning, cubes toasted in the oven for a few minutes)
1/2 cup basil leaves torn into bits
Salt and pepper to taste

In a medium-sized saucepan, heat the oil then add the onion and garlic. Cook for about 5 minutes, stirring occassionally, until the onions have softened. Add the tomatoes, then cook for 10-15 minutes until the tomatoes have broken down. Add the broth/water/juice, return to boil. Add the hunks of bread, reserving a handful, and the basil leaves. Stir to combine, then remove from heat. Let the soup sit for 10 minutes to let it soak into the bread chunks.

Serve immediately, topped with some parmesan cheese and the reserved croutons.

Saturday, July 18, 2009

Roasted Summer Squash with Feta Vinaigrette

Squash + feta = yum.

I love roasting vegetables. I think it's because I lived in the suburbs as a kid and we would spend half the summer grilling out on our deck. Sadly, our tiny apartment in the city also has a tiny yard and no space for a grill. There's a guy down the street who grills in his front yard. I've considered this, but I think our landlords would dislike it if I destroyed their nicely cultivated flower beds by placing a charcoal grill in the middle of them.

So I content myself with roasting. One day, I'll get around to buying some planks to add smoky, grilled flavor to my roasted foods. But in the mean time, I am content with the crispy, deliciousness of a plain roast.

I first saw this feta vinaigrette recipe on The Bitten Word. It's from Food and Wine magazine, one of the few food-related magazines I have yet to subscribe to. I followed their directions, but my vinaigrette came out a little too oily (You can see the olive oil pooling a little around the edges of the dish in the picture.) So I would suggest adding a little less oil and incorporating it gradually while whizzing the food processor. Mine was also not as creamy, I think because I bought some fresh aged feta at the farmer's market that was more Greek style. Look for French-style feta, the kind made from sheep's milk. Also, the recipe makes a good deal of vinaigrette, about 3/4 cup or so.

Feta vinaigrette.

Adapted from The Bitten Word, Food and Wine magazine, June 2009

2 medium-sized summer squash, any shape
1/2 tbsp olive oil
Salt
3 oz. feta, crumbled
2 1/2 tbsp red wine vinegar
1 tbsp water
1/2 tsp dried oregano
1/4 cup olive oil (LN: As noted above, you might need less)
Salt to taste (LN: Omitted. My feta was pretty salty already)

Preheat oven to 450 degrees. Wash the squash and chop off the ends. If you have a long thin squash, cut in half lengthwise, then chop into 1-inch half-moon pieces. If your squash is more round, cut into quarters. Toss squash with 1/2 tbsp olive oil and a little salt, then lay out flat on a cookie sheet. Bake in the oven for 20 minutes, turning squash after 10 minutes.

While the squash is cooking, combine the feta, vinegar, water and oregano in the food processor. Pulse to combine. Through the spout on the top, gradually add the oil while the processor is whizzing until you have a dressing consistency.

Remove squash from oven after 20 minutes and let cool. Drizzle squash with feta vinaigrette and serve immediately.

With a grill: If you do have a grill, try grilling the squash instead. Wash and cut off ends, then slice the squash in half lengthwise. Grill for 5 to 8 minutes until tender, then cut into chunks and drizzle with vinaigrette.

Friday, June 26, 2009

Stewed Cherries (with stems)

Cherries, for the lazy.

Today CCO told me he liked my blog because I often repeat myself, like a fugue. I couldn't take offense. It is true. I do repeat myself, particularly concerning my love of cherries. Often I don't make things with my cherries because I eat them immediately after returning the market. A couple weeks ago, my mom bought me an enormous 3-lb crate of cherries. That I could not eat all of immediately, so I decided to try some of the recipes I'd filed away for such an occasion.

This recipe, frankly, is genius. Part of the reason cherries are so hard to cook with is because of all the stemming and pitting required. The last time I made a cherry pie, I think I spent more time pitting than doing anything else. But this recipe does not require pitting. In fact, you are encouraged to skip the pitting and serve the cherries with stems still attached. The recipe recommends serving as a dessert with creme fraiche or whipped cream. I've decided this is even better as a breakfast treat with plain Greek yogurt.

From the Atlantic food blog, "Cherry Season Made Simpler" by Sally Schneider

Eat Rating: Awesome.
Difficulty: Easy. No pitting required.

1 lb cherries, stems and pits attached
2 tsbp to 1/4 cup sugar
2 tbsp water
1/2 vanilla bean (LN: I subbed 1/2 tsp vanilla extract)

Place the cherries, sugar and water in a medium sautee pan over medium heat. If using sweet cherries, use on the lower end of the sugar. If they are sour cherries, increase sugar to 1/4 cup. Add the vanilla, cover and cook for about 2 minutes, until the cherries have started releasing their juice and the liquid has started to turn reddish. Remove the lid, turn up the heat to high and cook stirring occassionally until the cherries are tender, about another three minutes. They may start to split. At this point, the recipe suggests removing the cherries and cooking down the syrup. My syrup was done, so I just turned off the heat. Serve with creme fraiche or whipped cream or yogurt, dunking each cherry in cream before eating.

Wednesday, June 24, 2009

Risotto with Spring Vegetables

Risotto with Spring Veggies.

In case I hadn't mentioned before, I love risotto. A normal person, after returning from the market with fresh peas, spring onion and mushrooms would make a stir fry. I make risotto. The funniest part about it is I never made risotto until I met CCO. I always thought it would be too hard. But he taught me the secret. It's not hard really. Just don't add more than 1/2 cup of broth at a time. That'll let it soak in the broth slowly, making it luscious and creamy.

Eat Rating: Awesome. My mouth is watering a little just thinking about it now.
Difficulty: Easy to Medium. Two, maybe three pots.

1 1/2 cups of arborio rice
4 to 5 cups mushroom broth
6 oz. fresh mushrooms, preferably shitake
1 quart English shell peas (or any other peas that require shelling)
2-3 spring onions
1 tbsp olive oil
1/2 cup dry white wine (LN: I used a Viognier because it was open in the fridge)
1/4-1/2 cup shredded Parmesan cheese (optional)

Cut the bulbs off the spring onions, reserving the stalks. Dice the bulbs finely. Cut up the onion stalks, making sure to keep separate from the bulb. Dice the mushrooms, if necessary.

Shell the peas. Bring a pot of water to boil, then steam or boil the peas for about 5 minutes until they become a bright green color. Remove from heat and set aside.

Bring the mushroom broth to a boil, then reduce heat. In a medium-sized saucepan, heat 1 tablespoon of olive oil, then add the bulbs from the spring onions and sautee until softened. Add the rice and wine, cooking for about 1 minute until wine has begun to absorb. Add about 1/2 of the heated broth and mushrooms. Cook the risotto until the rice has almost fully absorbed the broth. Add another 1/2 cup of broth and repeat, until all of the broth is incorporated. The rice should get puffy, the texture creamy like oatmeal. Once all of the broth is incorporate, mix in the Parmesan cheese and peas. Cook just until cheese is melted. Stir in the remaining onion from the green stalks. Serve immediately, preferrably with any leftover wine.

Wednesday, June 17, 2009

Summer Squash with Garlic, Lemon and Pepper

Lemony slices of squash.

Apologies for the lack of posts. It has been very hectic the past two weeks, necessitating carryout. Also my camera wasn't working, so I missed out on pics of a great stir fry.

Anyway, it is officially the start of summer squash season. This weekend at our farmer's market they had huge crates of squash, so I picked out some for Meatless Monday. I got six since they were small, three zucchinis, three yellow squash and some other light green variety. The light green was actually my favorite. I found the yellow one sort of bland. Feel free to mix and match with various squashes for a variety of flavors or use all the same kind.

Mini zucchinis.

Thinking that these probably also would have been good in my stir fry, I sauteed them up with some garlic and lemon. I think some spices might have been a nice touch, but sadly I didn't have any fresh ones.

Eat Rating: Good. It wasn't great as a main course, mostly because it's all the same flavor and texture. But I definitely think I'd make again for an easy, simple side dish.
Difficulty: Super easy.

Non-zucchinis. My favorites.

Adapted from How to Cook Everything Vegetarian by Mark Bittman

6 small squash or 3 large ones, washed and sliced
1-2 tbsp olive oil
2 clove garlic, minced
1 lemon, juiced
Ground black pepper, to taste

Heat the oil in a large sautee pan, then add the garlic. Cook for about 1 minute until garlic is soft. Add the squash, and cook for about 10 minutes until softened. Remove from heat. Squeeze the lemon juice over the cooked squash, tossing to cover. Add black pepper to taste. Serve immediately.